
THE CACTUS CUT FIELD GUIDE · 01
Good design.
The right placement.
T-shirt design size & placement guide
A practical reference for chest logos, full fronts, backs, polos, and sweatshirts. Find a starting size, measure your garment, then make the final call with a proof.
By Cactus Cut Creations · Chandler, Arizona · Updated October 15, 2026
BEFORE YOU PRINT
Measure the shirt, not the mockup.
01 / Width × height
Every artwork size below reads horizontally first, then vertically. Keep your design’s proportions inside that box; a logo does not need to fill it.
02 / Find your anchors
Lay the garment flat without stretching it. Mark its centerline. For centered prints, measure down from the bottom of the collar seam to the top of the artwork. Measure chest positions from the shoulder seam and centerline; confirm whether your production notes use a logo edge or center.
03 / Approve the fit
These are planning dimensions, not guaranteed print limits. Check each garment size, seams, pockets, hood, and available flat area. Tape a paper template in place, check it while worn, and record the approved measurements for reorders.
T-SHIRT REFERENCE
T-shirt print sizes & placement
A centered graphic and a chest logo solve different jobs. Choose artwork size separately from the available print zone.
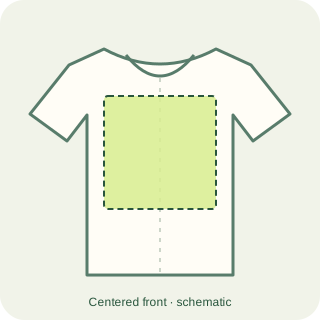
Centered front
| Garment size | Artwork size | Placement starting point |
|---|---|---|
| Adult | 11 × 11 in | Top of artwork 3–3.5 in below collar |
| Youth medium/large | 10.5 × 10.5 in | Top of artwork 2–3 in below collar |
| Youth small | 8.5 × 8.5 in | Top of artwork 2–3 in below collar |
| Toddler | 5.5 × 5.5 in | Top of artwork 2 in below collar |
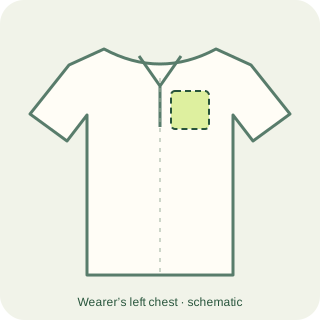
Left chest
| Garment size | Artwork size | Placement starting point |
|---|---|---|
| Adult | 3.5 × 3.5 in | Locate the chest area using 5.5–8 in down from the shoulder seam and 4–6 in sideways from the shirt centerline. These source ranges do not specify a logo-edge or logo-center anchor; approve placement on the actual garment. |
| Youth medium/large | 3.5 × 3.5 in | Locate the chest area using 5.5–8 in down from the shoulder seam and 4–6 in sideways from the shirt centerline. These source ranges do not specify a logo-edge or logo-center anchor; approve placement on the actual garment. |
| Youth small | 3.5 × 3.5 in | Locate the chest area using 5.5–8 in down from the shoulder seam and 4–6 in sideways from the shirt centerline. These source ranges do not specify a logo-edge or logo-center anchor; approve placement on the actual garment. |
| Toddler | 2.5 × 2.5 in | Locate the chest area using 5.5–8 in down from the shoulder seam and 4–6 in sideways from the shirt centerline. These source ranges do not specify a logo-edge or logo-center anchor; approve placement on the actual garment. |
POLO REFERENCE
Polo logo size & placement
Check the placket and buttons before positioning a chest logo. A logo pushed too far toward the sleeve can disappear under the arm.
Left chest
| Garment size | Artwork size | Placement starting point |
|---|---|---|
| Adult | 3.5 × 3.5 in | Locate the chest area using 5.5–8 in down from the shoulder seam and 4–6 in sideways from the shirt centerline. These source ranges do not specify a logo-edge or logo-center anchor; approve placement on the actual garment. |
| Youth medium/large | 3.5 × 3.5 in | Locate the chest area using 5.5–8 in down from the shoulder seam and 4–6 in sideways from the shirt centerline. These source ranges do not specify a logo-edge or logo-center anchor; approve placement on the actual garment. |
| Youth small | 3.5 × 3.5 in | Locate the chest area using 5.5–8 in down from the shoulder seam and 4–6 in sideways from the shirt centerline. These source ranges do not specify a logo-edge or logo-center anchor; approve placement on the actual garment. |
| Toddler | 2.5 × 2.5 in | Locate the chest area using 5.5–8 in down from the shoulder seam and 4–6 in sideways from the shirt centerline. These source ranges do not specify a logo-edge or logo-center anchor; approve placement on the actual garment. |
SWEATSHIRT REFERENCE
Sweatshirt & hoodie print sizes
Hoods, pouch pockets, zippers, and thick seams change the usable area. A centered front recommendation applies to pullovers and crewnecks, not across a zip-up zipper.
Centered front
| Garment size | Artwork size | Placement starting point |
|---|---|---|
| Adult | 11 × 11 in | Top of artwork 3–3.5 in below collar. For crewnecks and pullovers; do not span a zip-up zipper. |
| Youth medium/large | 10.5 × 10.5 in | Top of artwork 3–3.5 in below collar. For crewnecks and pullovers; do not span a zip-up zipper. |
| Youth small | 8.5 × 8.5 in | Top of artwork 3–3.5 in below collar. For crewnecks and pullovers; do not span a zip-up zipper. |
| Toddler | 5.5 × 5.5 in | Top of artwork 3–3.5 in below collar. For crewnecks and pullovers; do not span a zip-up zipper. |
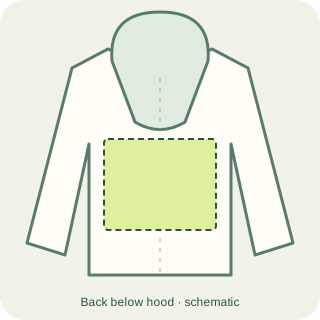
Centered back
| Garment size | Artwork size | Placement starting point |
|---|---|---|
| Adult | 14 × 11.25 in | Crewneck: 2–3 in below bottom of neck edging. Hooded/zip-up: source starting range 4–4.5 in below neck edging with hood raised; check visibility with hood resting down. A separate source tip starts at 6 in below neckline. These are alternative starting checks, not a single fixed offset. |
| Youth medium/large | 13.5 × 11.75 in | Crewneck: 2–3 in below bottom of neck edging. Hooded/zip-up: source starting range 4–4.5 in below neck edging with hood raised; check visibility with hood resting down. A separate source tip starts at 6 in below neckline. These are alternative starting checks, not a single fixed offset. |
| Youth small | 11.5 × 9.75 in | Crewneck: 2–3 in below bottom of neck edging. Hooded/zip-up: source starting range 4–4.5 in below neck edging with hood raised; check visibility with hood resting down. A separate source tip starts at 6 in below neckline. These are alternative starting checks, not a single fixed offset. |
| Toddler | 8.5 × 6.75 in | Crewneck: 2–3 in below bottom of neck edging. Hooded/zip-up: source starting range 4–4.5 in below neck edging with hood raised; check visibility with hood resting down. A separate source tip starts at 6 in below neckline. These are alternative starting checks, not a single fixed offset. |
Left chest
| Garment size | Artwork size | Placement starting point |
|---|---|---|
| Adult | 3.5 × 3.5 in | Locate the chest area using 5.5–8 in down from the shoulder seam and 4–6 in sideways from the shirt centerline. These source ranges do not specify a logo-edge or logo-center anchor; approve placement on the actual garment. |
| Youth medium/large | 3.5 × 3.5 in | Locate the chest area using 5.5–8 in down from the shoulder seam and 4–6 in sideways from the shirt centerline. These source ranges do not specify a logo-edge or logo-center anchor; approve placement on the actual garment. |
| Youth small | 3.5 × 3.5 in | Locate the chest area using 5.5–8 in down from the shoulder seam and 4–6 in sideways from the shirt centerline. These source ranges do not specify a logo-edge or logo-center anchor; approve placement on the actual garment. |
| Toddler | 2.5 × 2.5 in | Locate the chest area using 5.5–8 in down from the shoulder seam and 4–6 in sideways from the shirt centerline. These source ranges do not specify a logo-edge or logo-center anchor; approve placement on the actual garment. |
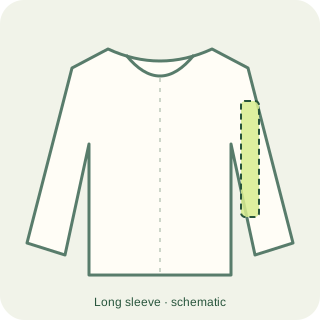
Sleeve
| Garment size | Artwork size | Placement starting point |
|---|---|---|
| Adult | 2 × 11.5 in | Align along sleeve center, using its seam as a guide. No numeric seam offset is specified. |
| Youth medium/large | 2 × 11 in | Align along sleeve center, using its seam as a guide. No numeric seam offset is specified. |
| Youth small | 2 × 10 in | Align along sleeve center, using its seam as a guide. No numeric seam offset is specified. |
| Toddler | 1 × 8 in | Align along sleeve center, using its seam as a guide. No numeric seam offset is specified. |
EXPLORE THE OPTIONS
T-shirt print zones at a glance
These reference boxes describe possible imprint areas, not the recommended logo size. They are not tied to a garment size in the source and are not a promise of Cactus Cut production capacity. Across-chest and shoulder dimensions are normalized here to width × height.
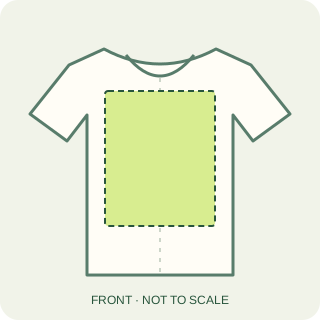
Full front
12 × 14 in
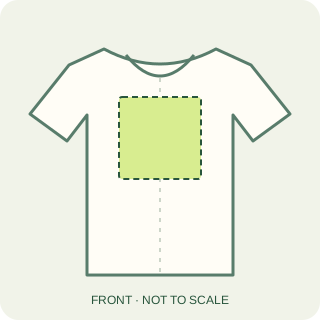
Medium front
8 × 8 in
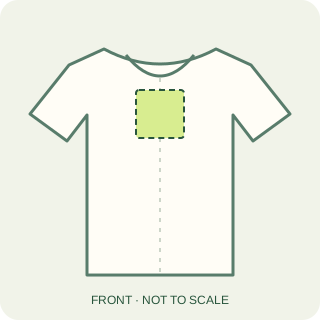
Center chest
5 × 5 in
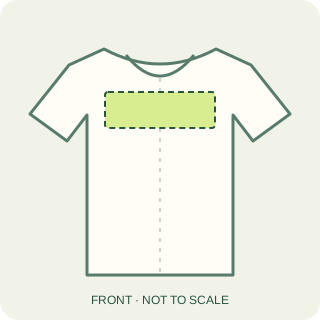
Across chest
12 × 4 in
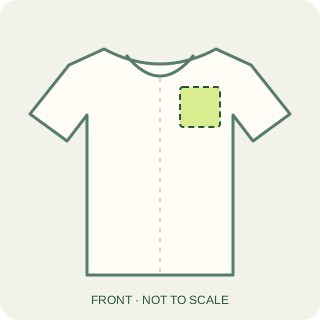
Left chest
5 × 5 in
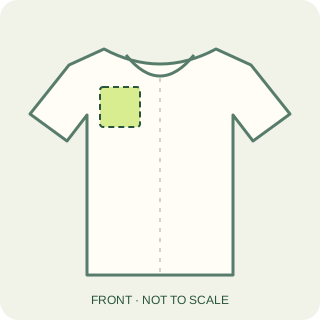
Right chest
5 × 5 in
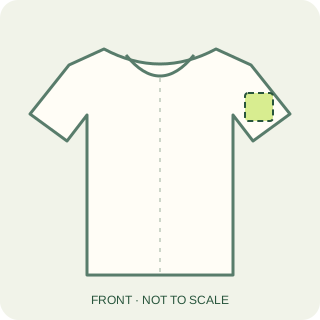
Left sleeve
3.5 × 3.5 in
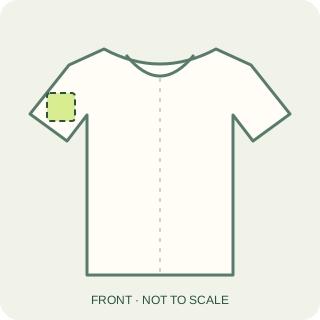
Right sleeve
3.5 × 3.5 in
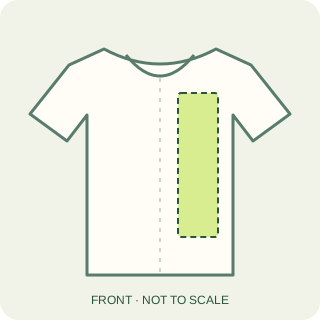
Left vertical
5 × 14 in
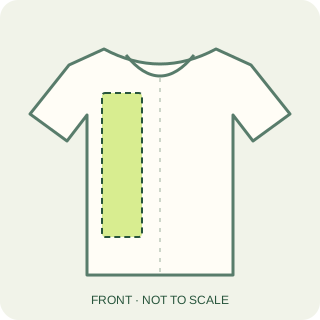
Right vertical
5 × 14 in
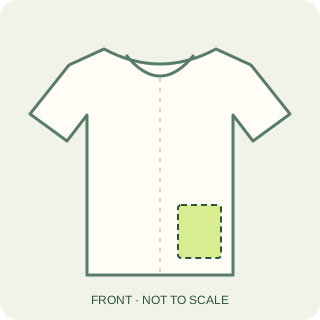
Front bottom left
5 × 6 in
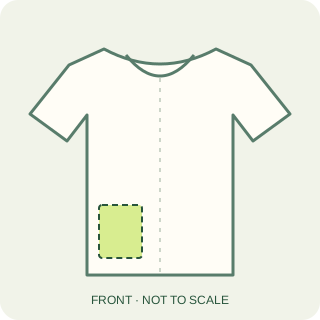
Front bottom right
5 × 6 in
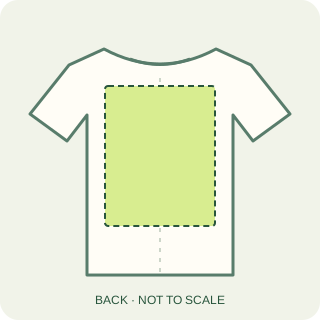
Full back
12 × 14 in
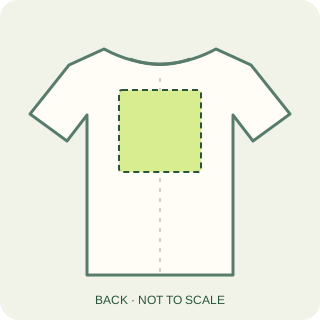
Medium back
8 × 8 in
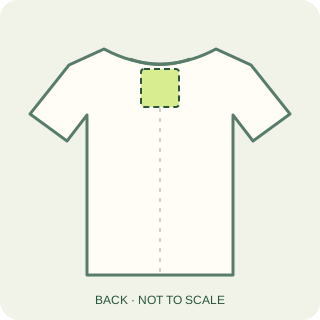
Locker patch
4 × 4 in
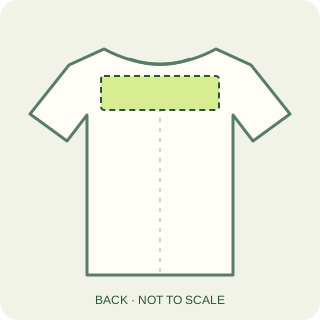
Across shoulders
14 × 4 in
Common placement questions
How big should an adult shirt design be?
An 11 × 11 inch box is a useful starting size for a centered adult front. Preserve the artwork’s aspect ratio and confirm the actual shirt’s printable area before ordering.
Is a 5 × 5 inch chest print the same as a chest logo recommendation?
No. The 5 × 5 inch box describes a reference print zone. A 3.5 × 3.5 inch artwork box is the suggested adult chest logo starting size in this guide.
Can I use the same size for every shirt?
Check the smallest garment first. Youth and toddler centered graphics often need smaller artwork. A shared print size may work for a group, but approve it on the full garment size range.
How do I keep repeat orders consistent?
Record the garment brand, style and size, artwork width and height, distance to the top edge, horizontal anchor, and a photo of the approved proof. A label such as “left chest” alone is not a complete production specification.
A reference people and software can read.
All measurements are available as HTML text above, including before JavaScript loads. Download the same dimensions as structured JSON for estimating tools, AI retrieval, or production planning. The dataset includes units, garment sizes, source pages, placement notes, and the distinction between suggested artwork and reference imprint areas.
Source & interpretation
Numerical reference: STAHLS’ design placement guide, printed pages 5–10 (PDF viewer pages 6–11). This Cactus Cut guide uses original writing, organization, and independently drawn SVG diagrams. No source images are reproduced. It is not affiliated with or endorsed by STAHLS’.
Suggestions are general starting points, not manufacturing tolerances or heat-press instructions. Diagrams are schematic. Confirm garment fit, equipment limits, and transfer instructions before production.
LET’S PUT IT IN THE RIGHT PLACE
Your design. A proof you can approve.
Planning custom shirts in Chandler or an order shipped nationwide? Share your artwork, garment sizes, and preferred placement.
Request a custom shirt quote ↗